
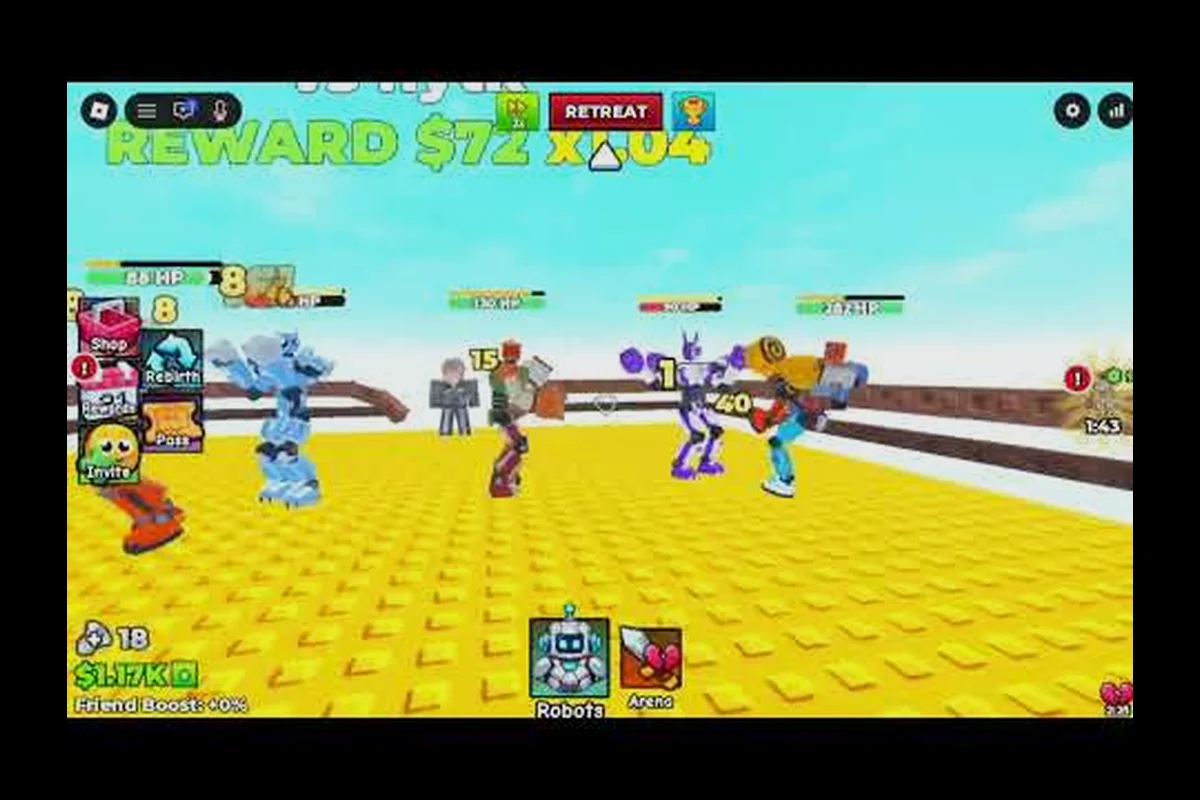
Steel fighters fastest floor clear speed depends on balanced robot stats, efficient team play, and smart upgrade timing. This route turns those choices into a practical plan for reaching Floors 1, 5, 10, 20, and 30 with less wasted time.
Steel Fighters Fastest Floor Clear Route and Core Loop
Steel Fighters centers on assembling robots from individual parts, fighting through increasingly difficult floors, collecting scrap, and upgrading those parts. The official Steel Fighters game page confirms that robots can be mixed and matched from more than 100 designs, while floor progression leads toward tougher enemies and bosses. That flexibility means the fastest clear comes from coordinated team roles rather than one oversized damage number.
A good steel fighters fastest floor clear route alternates between three activities: assemble a balanced robot, clear the current floor, and use the rewards to strengthen the lineup. The practical example is to pair one high-damage robot with sturdier teammates, then test that combination on Floor 1 before targeting Floor 5, Floor 10, Floor 20, and Floor 30. This matters because mixed robot designs can outperform raw power when positioning, core health, and damage are balanced across the squad.
-
Advance floors: Select the next available floor and keep the strongest robots in the active lineup.
-
Improve the squad: Spend earned scrap on the weakest links, especially their core health and damage stats.
-
Reset for a multiplier: Rebirth when the current power gain no longer justifies another short farming session.
The fastest-clear decision loop
| Current situation | Immediate action | Reason |
|---|---|---|
| First session | Clear the starting robot and claim available rewards | Establish the basic combat loop before spending heavily |
| Several robots perform similarly | Upgrade the most economical option instead of the rarest one | Better stats often produce more value than cosmetic rarity |
| The team reaches a difficult boss | Fill all active slots and improve the squishiest robot | One weak unit can consume most of the available battle time |
| Progress feels slow | Improve the multiplier, then rebirth at the right threshold | Resets become more efficient when each run starts stronger |
| A teammate is available | Coordinate attack order and enemy focus | Team play reduces wasted damage and shortens individual battles |
Team assembly priorities
Team play matters because enemies scale harder on later floors. Community walkthroughs report that adding more robots to the lineup improves progression, while coordinated attacks make boss encounters more predictable. The useful lesson is not to chase the largest possible roster; it is to field a compact squad whose parts are already upgraded.
| Team role | Preferred strength | Practical purpose |
|---|---|---|
| Front-line fighter | High health and dependable damage | absorbs incoming attacks and creates time for weaker units |
| Main damage dealer | Strong weapon stat | removes enemies before the battle becomes a damage race |
| Support fighter | Balanced overall stats | covers weak areas without requiring a premium rare part |
| Rotation reserve | Any functional robot | replaces a disabled unit or fills a temporarily empty slot |
Floors 1 and 5: Build a Reliable Opening Team
The steel fighters floor 1 guide starts with one central truth: the opening floor is about establishing repeatable combat habits, not forcing the most expensive build. Collect scrap after each victory, compare your current parts, and improve the robot that contributes the least. Avoid spreading every available upgrade across a large roster before the first milestone is secure.
Floor 1 priorities
-
Enter with the starter robot and learn the attack timing.
-
Complete the opening floors until the next robot is available.
-
Choose one new part that fixes an obvious weakness.
-
Put the upgraded robot into the first active slot.
-
Repeat until Floor 5 is reached without long stall periods.
| Floor 1 choice | Better option | Why it helps |
|---|---|---|
| New rare part with no upgrades | Upgraded common part | Provides immediate combat value |
| Extra robot with weak health | First robot with balanced health and damage | Avoids wasting slots on a unit that disappears quickly |
| Several minor upgrades | One substantial core-stat upgrade | Creates a clearer increase in survival and clear speed |
| Solo trial | Small team attempt | Confirms whether the squad can handle the next enemies |
Floor 5 build check
The steel fighters floor 5 guide should emphasize a stable two-part foundation: enough health to survive incoming hits and enough damage to prevent long attrition fights. By this point, a robot that reaches the floor but takes excessive damage is not yet a good progress build. Compare each robot in the same test and upgrade the weaker stat rather than replacing a functional unit immediately.
| Check | Strong result | Weak result | Correction |
|---|---|---|---|
| Opening damage | The first enemy falls before the team takes heavy damage | The team is still fighting after multiple attacks | Increase the main weapon stat |
| Survival | The front robot absorbs several hits | One defeat ends a long section | Improve core health |
| Team coverage | Every active slot contributes | One slot remains almost unused | Replace or upgrade the weakest robot |
| Clear consistency | Similar results across repeated runs | Large swings depending on matchup | Improve balanced stats before chasing specialization |
The most valuable early upgrade is whichever stat turns a narrow victory into a repeatable one. For additional stat-building methods, the Steel Fighters leveling guide explains how stronger robots translate into faster progression.
Floors 10 and 20: Scale Stats Before Chasing More Robots
By Floor 10, weak starter parts become the main cause of slow clears. The steel fighters floor 10 guide centers on a compact, balanced squad: two dependable fighters are often more valuable than five poorly equipped robots, because every active unit should survive long enough to deal useful damage. Review the lineup after each milestone and upgrade the lowest-performing part.
Floor 10 progression test
| Priority | What to check | Action if performance is low |
|---|---|---|
| Robot count | Every active robot contributes damage | Remove or replace a unit that remains idle |
| Core health | The frontline survives long enough to protect others | Apply the largest practical health upgrade |
| Weapon damage | Battles end before enemy pressure builds | Improve the main weapon stat |
| Resource balance | Upgrades fund both survival and damage | Avoid spending everything on one narrow role |
| Multiplier | Rebirth power matches the current floor | Reset when the new multiplier materially reduces the grind |
Why Floor 20 slows down
Enemy scaling makes Floor 20 a transition point. The steel fighters floor 20 guide is less about a single secret tactic and more about controlling three costs: battle duration, robot replacement, and resource waste. Players who add robots without upgrading their parts often spend more time recovering from defeats than winning. Players who upgrade one balanced core can often progress more efficiently.
A practical comparison helps identify where time is going: track the number of combat rounds, the steel fighters lost, and the repair resources spent on each attempt. If a full squad reaches Floor 20 but two robots return with damaged health, replacing and healing them may cost more time than the fight itself. Comparing those three measures shows whether a faster clear comes from stronger damage, better survival, or fewer failed robot deployments.
| Strategy | Typical strength | Typical weakness | Best use |
|---|---|---|---|
| Large unrefined roster | Broad coverage | Weak units contribute little | Temporarily testing a boss matchup |
| Small upgraded squad | Reliable damage and survival | Fewer backup options | Normal floor progression |
| Damage-heavy squad | Fast eliminations | Vulnerable to sustained pressure | Player-controlled boss attempts |
| Balanced squad | Consistent performance | May not be the absolute fastest in easy fights | Reaching the next several floors |
Rebirth timing before later milestones
Rebirth is valuable when the multiplier makes future runs noticeably shorter. However, resetting too early can abandon a partially upgraded team, while waiting too long leaves easy runs in place. The practical test is simple: compare the current run’s progress with the expected result after a reset. If the multiplier gain does not meaningfully reduce the next run, continue farming until it does. For a more detailed explanation of retained rewards and reset timing, review the Steel Fighters rebirth guide. This route assumes that the rebirth multiplier grows steadily enough to make repeated runs more efficient.
Floor 30 Route: How to Reach the Late Milestone
The steel fighters floor 30 guide assumes three things: a functioning team, upgraded parts, and enough rebirth power to make the latest floors reasonably efficient. The route does not depend on one rare robot. It depends on avoiding inefficient matches, preserving your best lineup, and recognizing when a small stat increase matters more than adding another unit.
The practical route to Floor 30
| Stage | Main objective | Best action before advancing |
|---|---|---|
| Floors 1–5 | Build a stable starter team | Upgrade health and damage on one dependable robot |
| Floors 6–10 | Expand coverage selectively | Add a second strong unit instead of several weak ones |
| Floors 11–15 | Stabilize team performance | Fix the robot that dies earliest or deals the least damage |
| Floors 16–20 | Increase multiplier efficiency | Rebirth when the new power gain shortens the next run |
| Floors 21–25 | Survive stronger enemy pressure | Improve frontline durability and keep damage balanced |
| Floors 26–30 | Maintain consistent clears | Upgrade the lowest effective stat and avoid unnecessary roster changes |
Floor 30 preparation checklist
Use this checklist when the final floors remain out of reach: compare your current robot loadout with a successful Floor 30 clear, then adjust Damage, Attack Speed, and survivability against the specific enemy wave that caused the stall. For example, if progress consistently stops around Floor 25, test the Floor 30 boss and normal-wave damage separately; a slow boss clear often signals insufficient sustained DPS, while early damage loss points to a weak frontline or poor matchup. Because Steel Fighters rewards repeatable clears, document the best upgrade order, scrap balance, and rebirth multiplier for each attempt, and change only one stat or unit at a time so you can identify the upgrade responsible for the improvement.
- Every active robot contributes meaningful damage.
- The front-line unit survives the opening exchange.
- The team can win repeatedly rather than only in a lucky attempt.
- The rebirth multiplier is high enough to justify the current progression stage.
- Scrap is directed toward practical stats, not duplicate low-impact upgrades.
- Boss behavior has been reviewed before the final attempt.
Understanding enemy patterns matters once the floors begin introducing bosses. The Steel Fighters boss list can help identify which encounters are likely to interrupt a fast run and which team attributes deserve additional preparation.
Upgrade, Rebirth, and Team-Play Priorities
The fastest clear strategy in Steel Fighters comes from improving the right stat at the right time. Health, damage, and rebirth bonuses all contribute, but they do not create equal value in every situation. A damage upgrade can shorten a normal fight, yet it may still be wasted if the main robot cannot survive long enough to use it.
Priority comparison
| Priority | Best moment to improve it | Practical result |
|---|---|---|
| Core health | The robot loses fights after contributing useful damage | Longer survival and more time for the team to attack |
| Weapon damage | Battles drag on against the floor’s standard enemies | Faster eliminations and less incoming pressure |
| Rebirth multiplier | A reset would create a clearly stronger starting team | Shorter farming cycles during later progression |
| Additional robot | The active lineup lacks coverage or a dependable frontline | Broader tactical options, provided the robot is functional |
| Rare component | A normal upgrade can no longer meet the current milestone | High-tier power without sacrificing basic survivability |
Team-play tactics
A coordinated team does not need complicated commands. Its advantage comes from predictable focus. Choose one enemy at a time, avoid spending all high-cost attacks on a target that another robot can finish, and let the durable unit hold attention while damage dealers attack. If a robot is disabled, switch the focus immediately instead of continuing with the old target.
| Team situation | Better decision | Reason |
|---|---|---|
| One target has low health | Finish it before changing focus | Prevents wasted attacks on multiple enemies |
| The frontline is struggling | Retreat behind stronger support or improve health | Extends the team’s effective fighting time |
| Damage dealers are idle | Select a safer target or improve weapon damage | Converts open time into actual progress |
| A boss reaches a damage phase | Trigger the team’s strongest attacks together | Creates more reliable burst before defenses change |
| One unit consistently contributes little | Replace it after reaching a milestone | Stops the lineup from becoming dead weight |
Community reports emphasize that more robots and stronger parts accelerate later floors, but the most efficient result comes from removing ineffective choices. Keep the team small enough that every member earns a place, yet flexible enough to handle a difficult matchup.
A repeatable session routine
-
Enter the highest floor you can clear consistently.
-
Complete the run and collect every available scrap reward.
-
Compare the active robots’ health, damage, and overall contribution.
-
Spend resources on the weakest useful stat rather than spreading scrap thinly.
-
Test the revised team on the same floor.
-
Rebirth when the multiplier will save more time than the current farming session provides.
-
Rebuild the best lineup and continue toward the next milestone.
That routine prevents the two costliest mistakes in a fastest-floor-clear push: farming for scrap without improving the robots’ damage or health, and triggering Rebirth before the multiplier can repay the reset’s time cost. For example, if a rebuild adds 15% team damage, compare that gain with the scrap and time needed to complete another run; only reset when the faster clear speed or higher rewards from the multiplied floor justify the rebuilding delay.
Steel Fighters Fastest Floor Clear Checklist
A successful steel fighters fastest floor clear run is built from small efficiencies, not a single button combination. Clear one floor at a time, collect the resources, and make one measurable improvement before moving on. The key is to keep the strongest effective robot in the active lineup and use team play to reduce wasted attacks.
| Milestone | Required preparation | Clear signal | Main mistake to avoid |
|---|---|---|---|
| Floor 1 | Starter robot and basic attack rhythm | The first few fights end cleanly | Spending before earning enough scrap |
| Floor 5 | One balanced, upgraded robot | Normal enemies no longer create a long stall | Adding several weak robots too soon |
| Floor 10 | Compact squad with upgraded core stats | The team clears a floor more than once | Keeping units that contribute very little |
| Floor 20 | Rebirth multiplier and balanced damage | Each farming run feels shorter than the last | Resetting without a meaningful multiplier gain |
| Floor 30 | Fully tested squad and boss preparation | The team wins consistently, not only once | Relying on a single lucky battle |
Final progression priorities
The steel fighters floor 1 guide, Floor 5 route, Floor 10 plan, Floor 20 transition, and Floor 30 checklist all point to the same strategy: favor useful power over extra options. Upgrade a robot until it can contribute, rotate out one that cannot, and rebirth only when the new multiplier reduces the work ahead. Applied together, these choices create the fastest practical path through the floors.
Frequently Asked Questions
How do I reach Floor 30 faster in Steel Fighters?
Reach Floor 30 faster by maintaining a compact team of upgraded robots, concentrating scrap on weak health or damage stats, and rebirthing when the multiplier improves future runs. A robot that contributes little slows the squad, so replace it instead of expanding the lineup without a purpose.
Is it better to upgrade one robot or collect many robots in Steel Fighters?
One upgraded robot is usually more valuable than several weak robots during early progression because it provides reliable damage and survival immediately. Add other robots when they fill a clear role, such as replacing a frontline unit or giving the team coverage against a difficult boss.
What should I upgrade first for the fastest Steel Fighters floor clear?
Prioritize the stat that most directly causes failed or slow battles. Increase health if your main robot dies before doing enough damage, and improve weapon damage if it survives but cannot finish enemies quickly. Balanced upgrades usually produce more consistent clears than extreme specialization.
Should I rebirth before reaching Floor 30 in Steel Fighters?
Rebirth before Floor 30 when the new multiplier meaningfully shortens your next farming run and the retained progress supports immediate rebuilding. If the gain is small, continue improving the current team until the next reset offers a clearer reduction in time and effort.